

This option allows you to scan a hard drive, a folder, or removable media for MP3s. Before information is added to the database, you are given an opportunity to clean up the information retrieved from the MP3s.
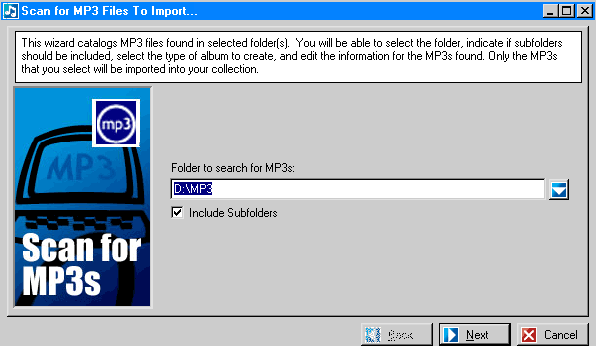
Here, the �D:\mp3� folder, and all of its� subfolders will be searched for MP3 files.
After pressing NEXT, the folders are scanned for MP3s:
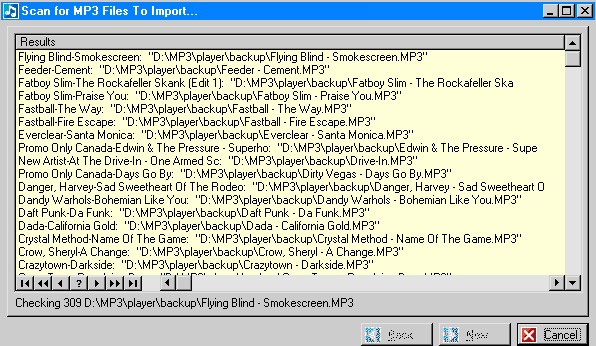
After scanning has completed, use the tagging and single entry operations as many times as required to clean up the information that has been read directly from the MP3s, then press NEXT.
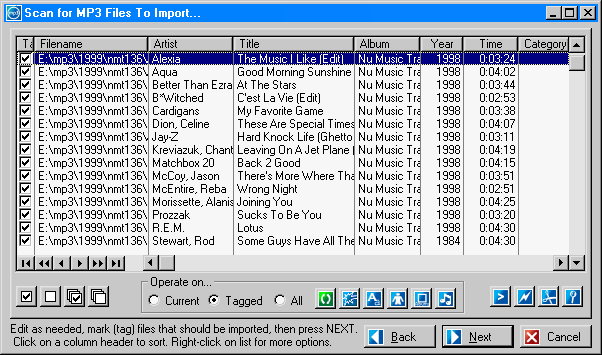
Options on this window are (from left to right):
Tag, Untag, Tag All, Untag All � Select/unselect MP3s for tagged operations, and for importing. When you press Next, untagged files are discarded from the list.
Operate On � Editing operations for the currently highlighted MP3, tagged MP3s, or all MP3s include:
- Swap artist and title fields.
- Trim/remove excess characters in artist(s) or title(s): numeric, left of dash, right of dash.
- Auto-capitalize.
- Select/check artists: select an artist to apply to all MP3s or all MP3s without an artist, or check order of artists. An example of artist order checking is where the MP3 artist is �The Rolling Stones�, but in your Artists database you only have �Rolling Stones, The� setup; in this case �The Rolling Stones� is automatically changed to �Rolling Stones, The�.
- Use filename for artist and title: Base the artist and title information on the original file name.
- Re-read MP3: Read the artist, title, and other information from the MP3 file. By default this is done for all MP3s when first scanned.
Play, Edit, Delete � Operations for the currently highlighted MP3 only. �Edit� allows you to manually change MP3 information before importing. �Delete� will remove the MP3 from the approval list (not the actual MP3 on disk).
Replace � Search and replace any field in any set of MP3s in the list.
Finally, specify how file numbers should be assigned, and how the MP3s should be divided into Albums.
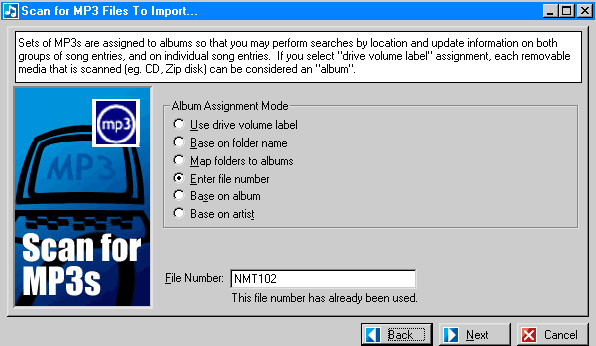
There are 6 options.
- Use drive volume label: Recommended for removable media only
- Base on folder name: Uses the last sub-folder name as the file number (eg. c:\mp3\nmt123 would have NMT123 as the file number). This is the quickest and easiest method; you can always edit the file number at a later date (see Editing Albums) if you wish.
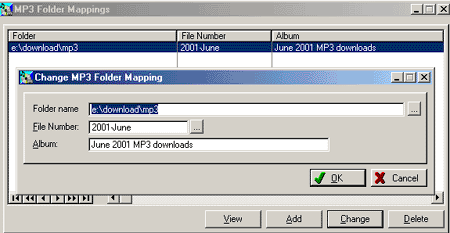
- Map folders to albums: Individual folders are mapped to specific albums. This gives maximum flexibility when you want to divide related MP3 files into �albums�, but requires the most setup. Pressing the �Folder Mapping� button displays the list of MP3 Folder Mappings, which may be edited.
- Enter file number: A single file number is used for all imported MP3s.
- Base on album: The first 3 characters of the album field for each MP3 is used to generate a unique file number for the current session.
- Base on album: The first 3 characters of the artist field for each MP3 is used to generate a unique file number for the current session.
Once you have finished specifying the Album Assignment Mode, press the OK button to transfer the tagged MP3 files into your MusiFind Pro collection.